The Fibonacci Sequence: How It Can Improve Your Email Sequences
Learn how to apply the principles of the Fibonacci Sequence when creating email sequences for your business.

Was Mathematics one of your strong subjects back in high school? If not, I am still quite sure that you must have heard about the Fibonacci Sequence.
In this article, we are going to cover these topics:
- What is the Fibonacci Sequence?
- What is an Email Sequence?
- Importance of Fibonacci Sequence to Email Sequences
- How to Apply the Fibonacci Sequence to Email Sequences
- Live Example: How to Create Email Sequences with Engage
- Getting Started On Engage.
What is the Fibonacci Sequence?
The Fibonacci sequence is a series of numbers where the next number is found by adding up the two numbers before it:
0, 1, 1, 2, 3, 5, 8, 13, 21, 34, . . .
- We got 2 by adding the 2 numbers before it (1 + 1),
- 5 is 2 + 3,
- and so on
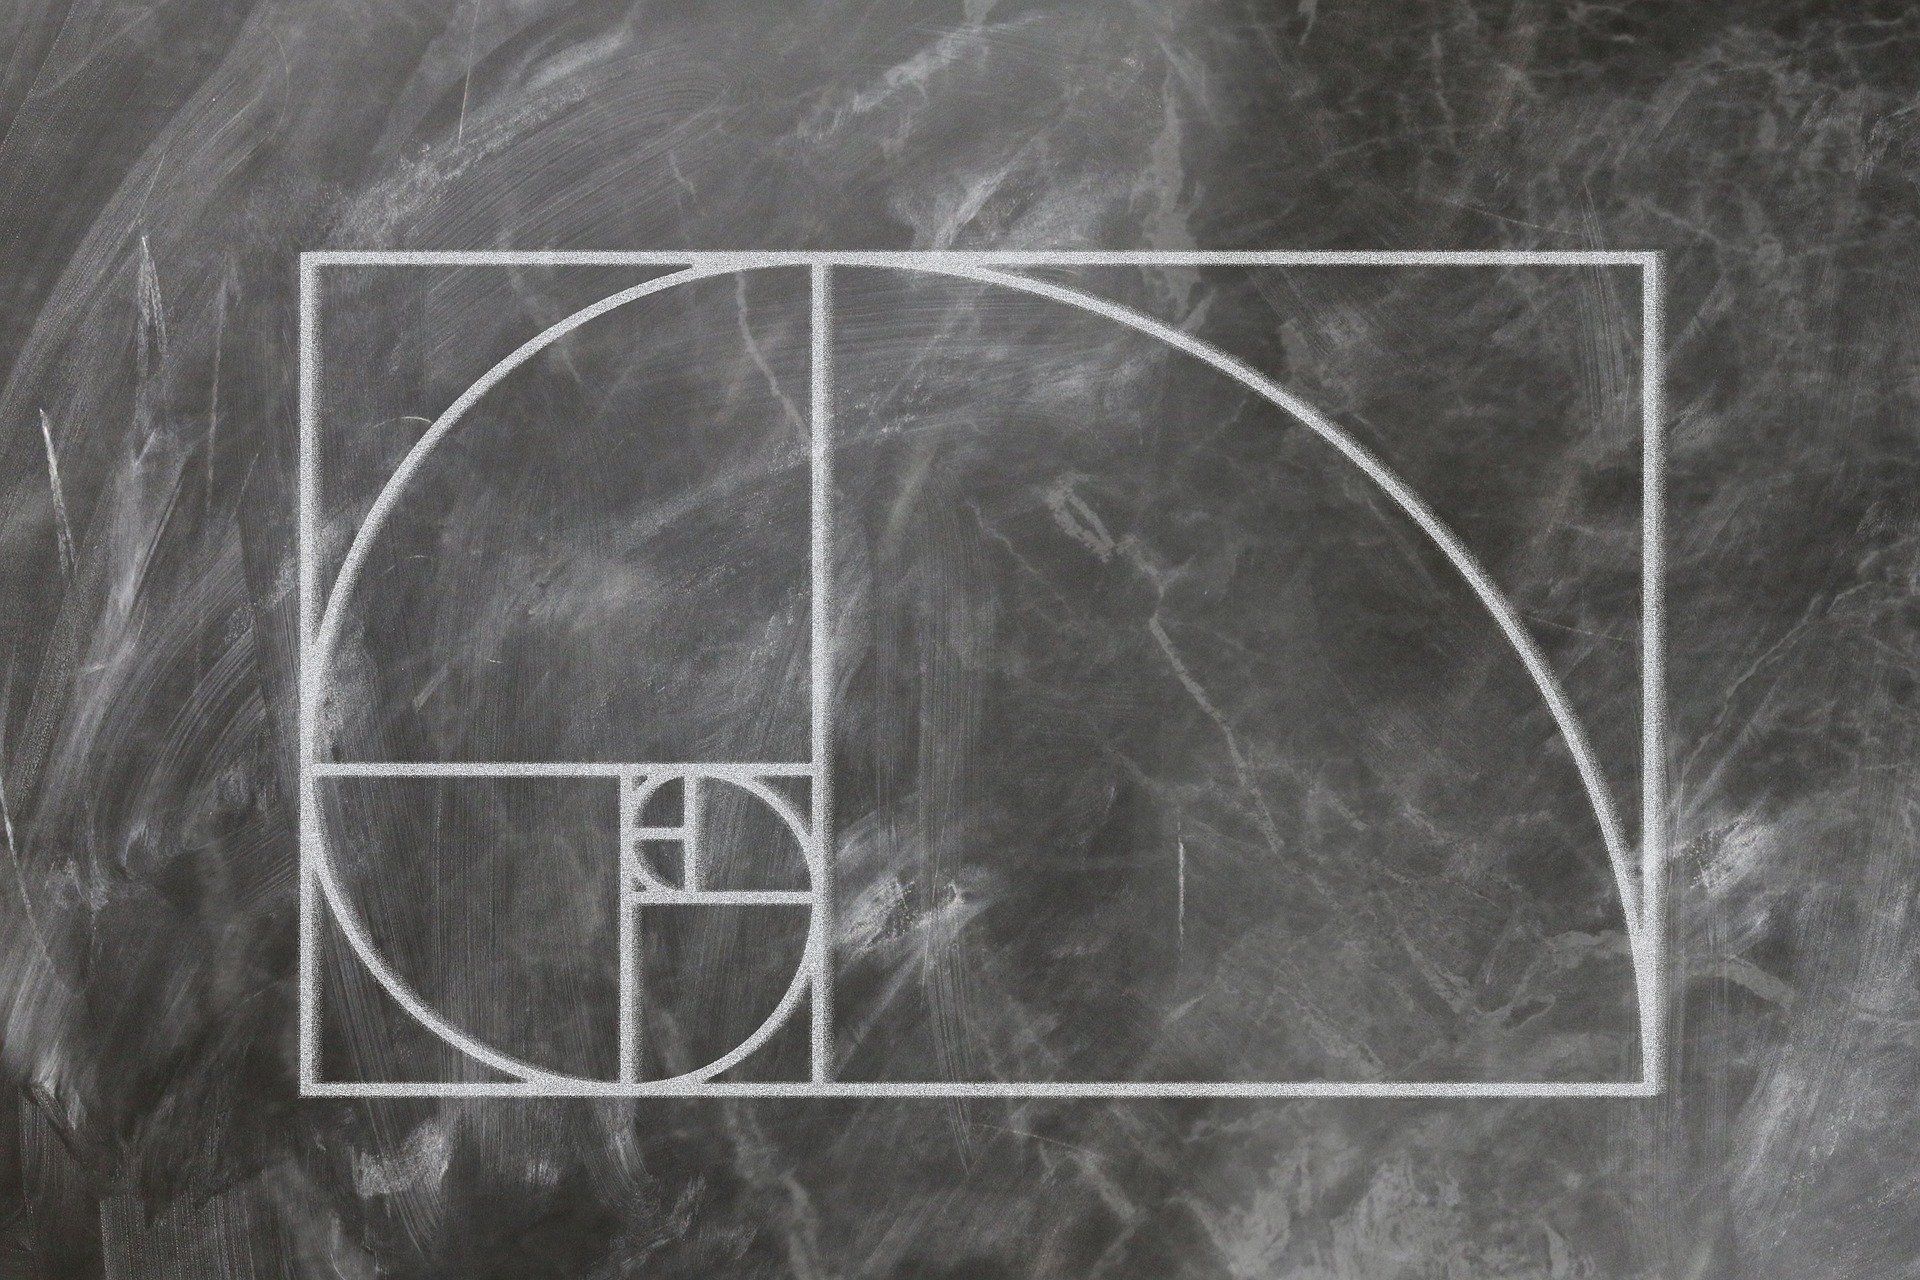
When we make squares with those widths, we get a nice spiral.
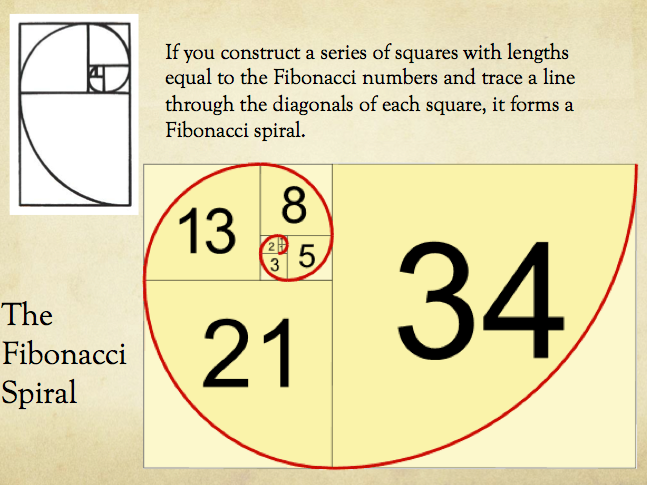
Do you see how the squares fit neatly together? 3 and 5 make 8, 8 and 13 make 21, and so on.
The Fibonacci sequence can be found everywhere in nature. You can find the Fibonacci Sequence present in the Sunflower:

You can also find the Fibonacci Sequence present in the shells of a Snail:

Very Important: Keep this sequence in mind as we move on to the next topic:
0, 1, 1, 2, 3, 5, 8, 13, 21, 34, . . .
What is an Email Sequence?
An email sequence, also called a drip campaign is a series of emails that are automatically sent to people over a period of days. One example is an Onboarding email sequence that guides the customer through next steps via email over a period of days.
Importance of Fibonacci Sequence to Email Sequences
The day intervals between email sequences need to be perfectly spaced out to achieve the best performance. Too short, and it can come off as spammy. Too far, and it can lose its effect. The question then becomes: how do we achieve the perfect interval? Fibonacci Sequence!
How to Apply The Fibonacci Sequence to Email Sequences
When creating an email sequence, you should delay each email according to the Fibonacci series. As we have seen earlier, the Fibonacci Sequence occurs everywhere in nature, and applying it to your email sequences will improve your email engagement by creating a perfect interval between the emails.
This table explains what I mean:
By applying the principles of the Fibonacci Sequence, you can quickly create email sequences that convert. Because the emails are well spaced, your follow up emails to your customers or subscribers feel less spammy, and your click to open rate will improve.
Live Example: How to Create Email Sequences With Engage
In this example, we are going to be applying the principles of the Fibonacci Sequence to create an Onboarding Sequence for new users who create an account on the platform of Company A.
We will follow the following steps:
Step One:
Create a map of your email sequence. When creating a map of your sequence, make sure you apply the Fibonacci series.
Step Two:
Draft the emails in your sequence. For every email in your sequence, make sure you offer value to your subscribers and add a call to action to every email.
Step Three:
Use the right marketing automation software to create and launch your email sequence. For this last part, we will be using Automations in Engage.
- Login to your Engage account. (Create an account if you do not have one).
- Go to Automations. (Link on the navigation sidebar).
- Click on the Create New Automation button.
- Enter details of your Automation and click the Next button
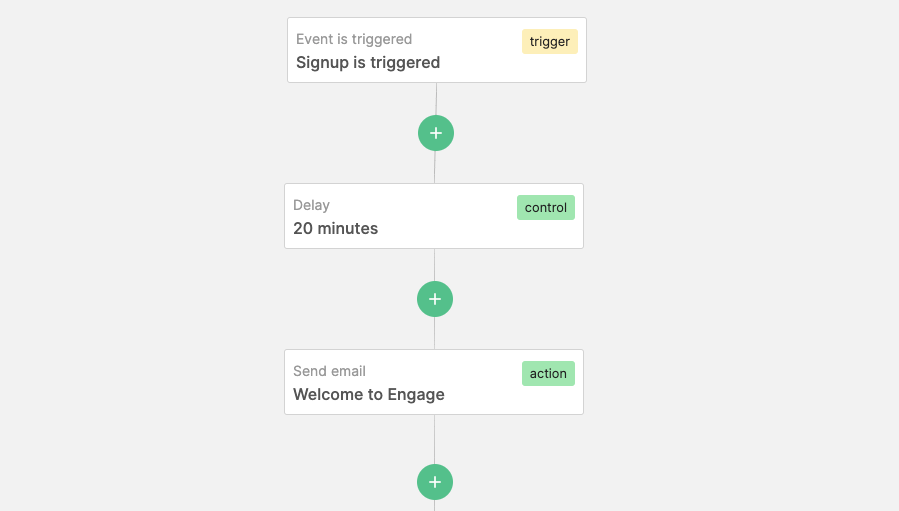
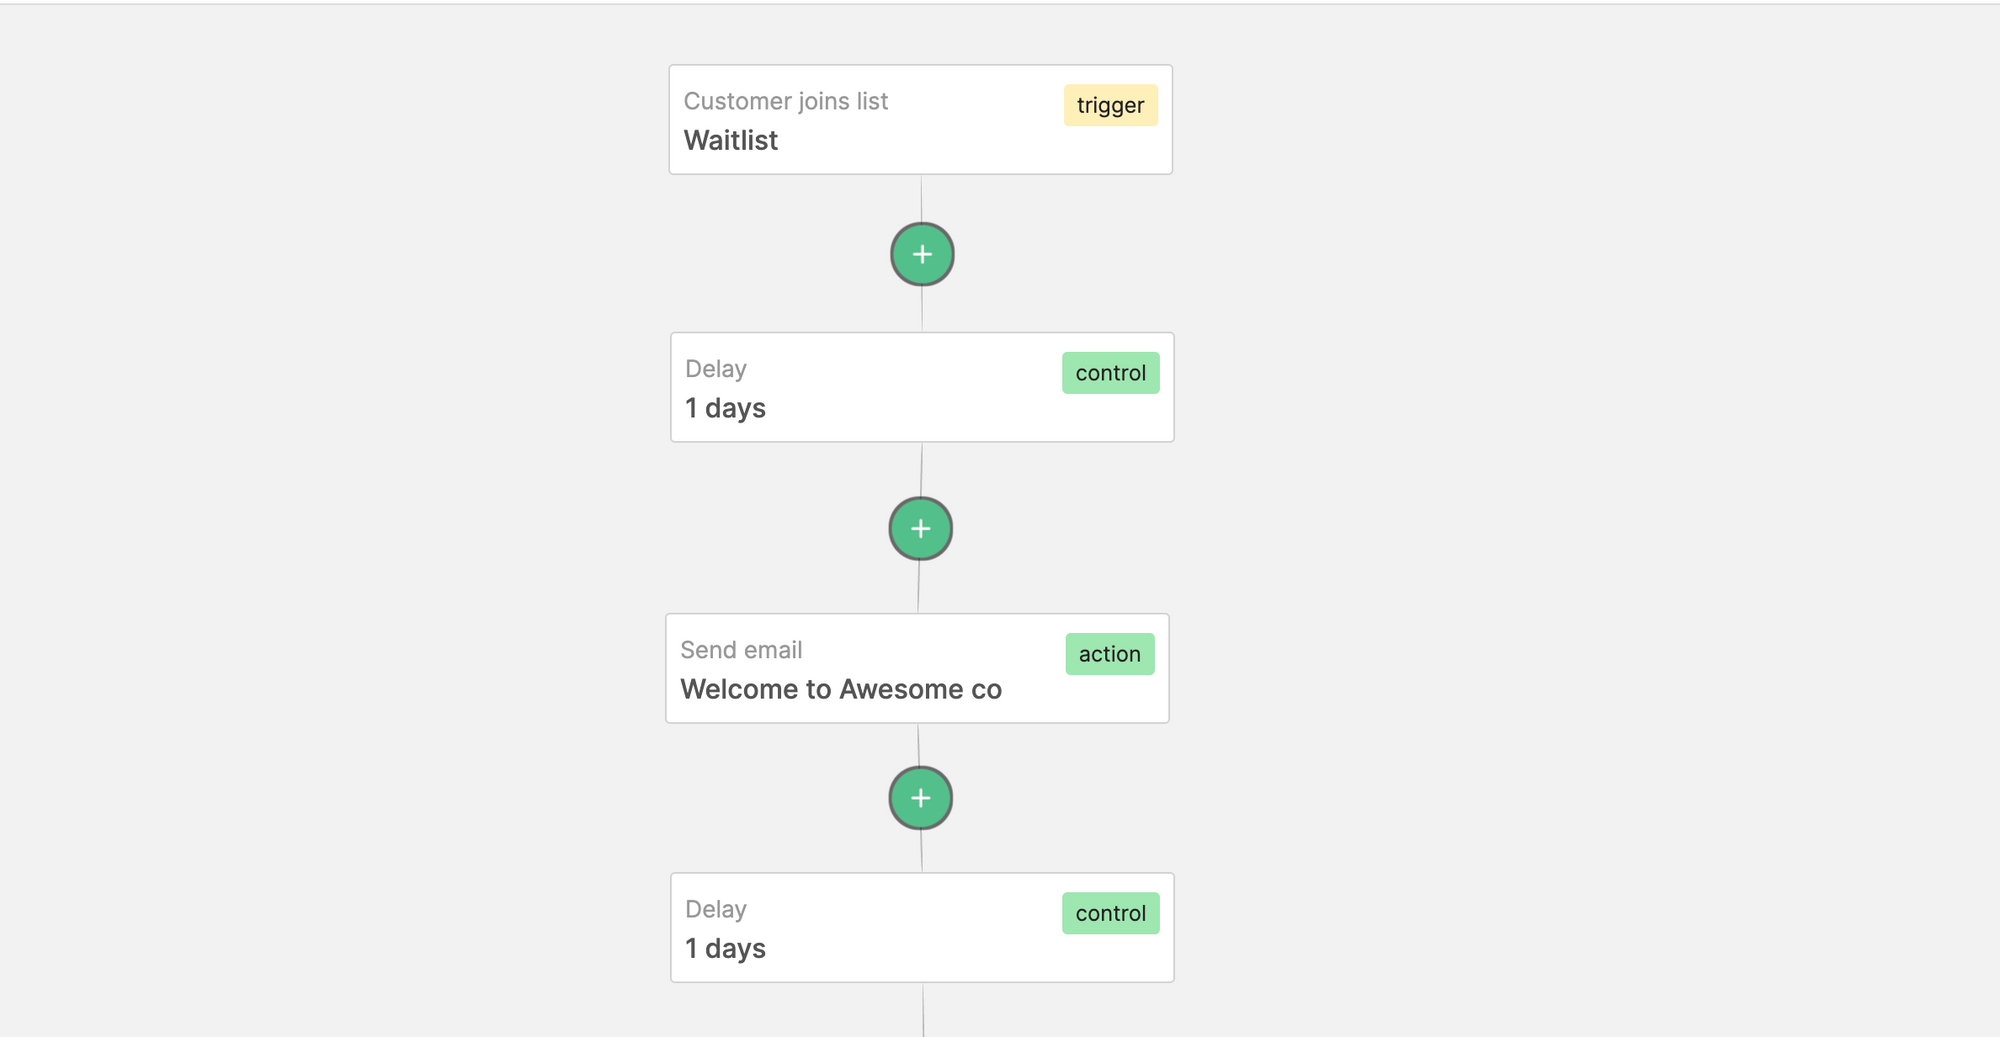
- Click the Start button and set a trigger for your automation. An automation trigger is an action that starts the sequence. An example trigger could be when people subscribe to your List.
- Add the necessary delays and emails according to your draft.
- Go live!

Get Started With Engage
As you have seen, you can easily create your email sequences and apply the principles of the Fibonacci series with Engage. You can even create other types of email sequences triggered by user actions. These are generally referred to as automations.