Tracking deliveries, opens, clicks, failures and complaints for Amazon SES
How to track Amazon SES mail events at scale using event publishing and configuration sets.


There are various ways to monitor email sending events if you use Amazon Simple Email Service (SES). Email sending events refer to metrics related to emails you send from the service. These are:
- Sends - Emails that have reached Amazon SES
- Rejects - Emails Amazon SES did not attempt delivery on. A reason for this could be if it contained a virus for example.
- Bounces - Emails that were sent but rejected by the receiver’s mail server or SES. This could happen if the email address does not exist for example.
- Complaints - Emails marked as spam by recipient
- Deliveries - Emails successfully delivered
- Opens - Emails that have been opened
- Clicks - Link within email was clicked
- Rendering Failures - Template rendering issue with email. This will only happen if you are using Amazon SES Templates
Amazon SES has a Sending Statistics page and Reputation dashboard page that shows the number of deliveries, rejects, bounce and complaints. But what if we want to see which emails were actually rejected or bounced? Or even see the emails that were opened and links that were clicked? Or perform an action when any of these event occur? Enter event publishing.
Event publishing
Event publishing is simply telling Amazon SES to send email sending events to a particular destination. The way it works is this:
- You create a configuration set. A configuration set lets you select the events you want Amazon SES to send and to what destination (Amazon CloudWatch, Firehose or SNS).
- When sending an email, you tell Amazon SES to use that configuration set. Amazon SES will then send the events for the email (or emails) to the configuration set destination. For this post, we will be using Amazon SNS (Simple Notification Service) as our destination. With SNS, you can further send the events to a webhook.
Creating a configuration set and SNS destination
Let’s start by creating a configuration set.
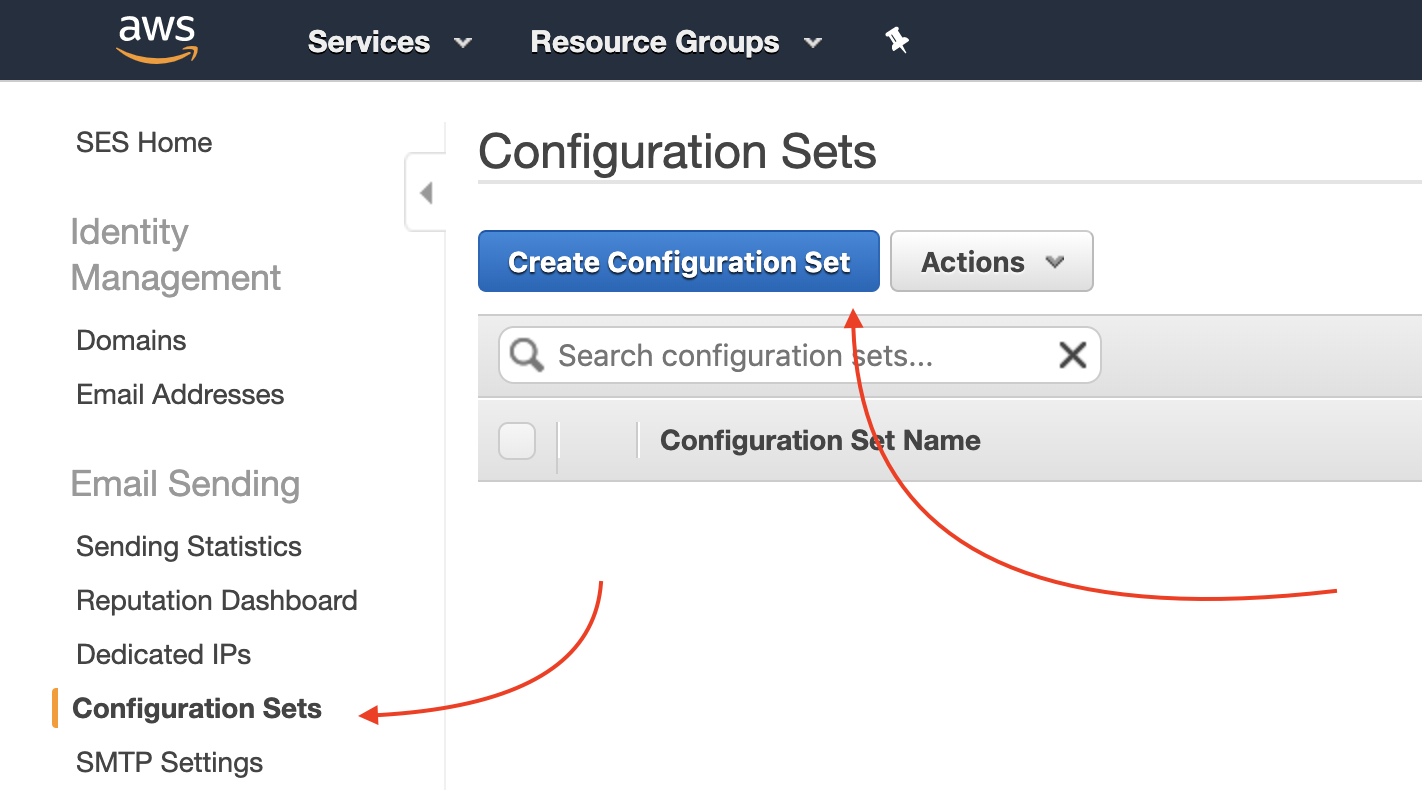
- Go to your SES dashboard in your AWS console
- Click on Configuration Sets in the left menu option
- Click on Create Configuration Set button
- You will need to give it a name. Add a name and create.
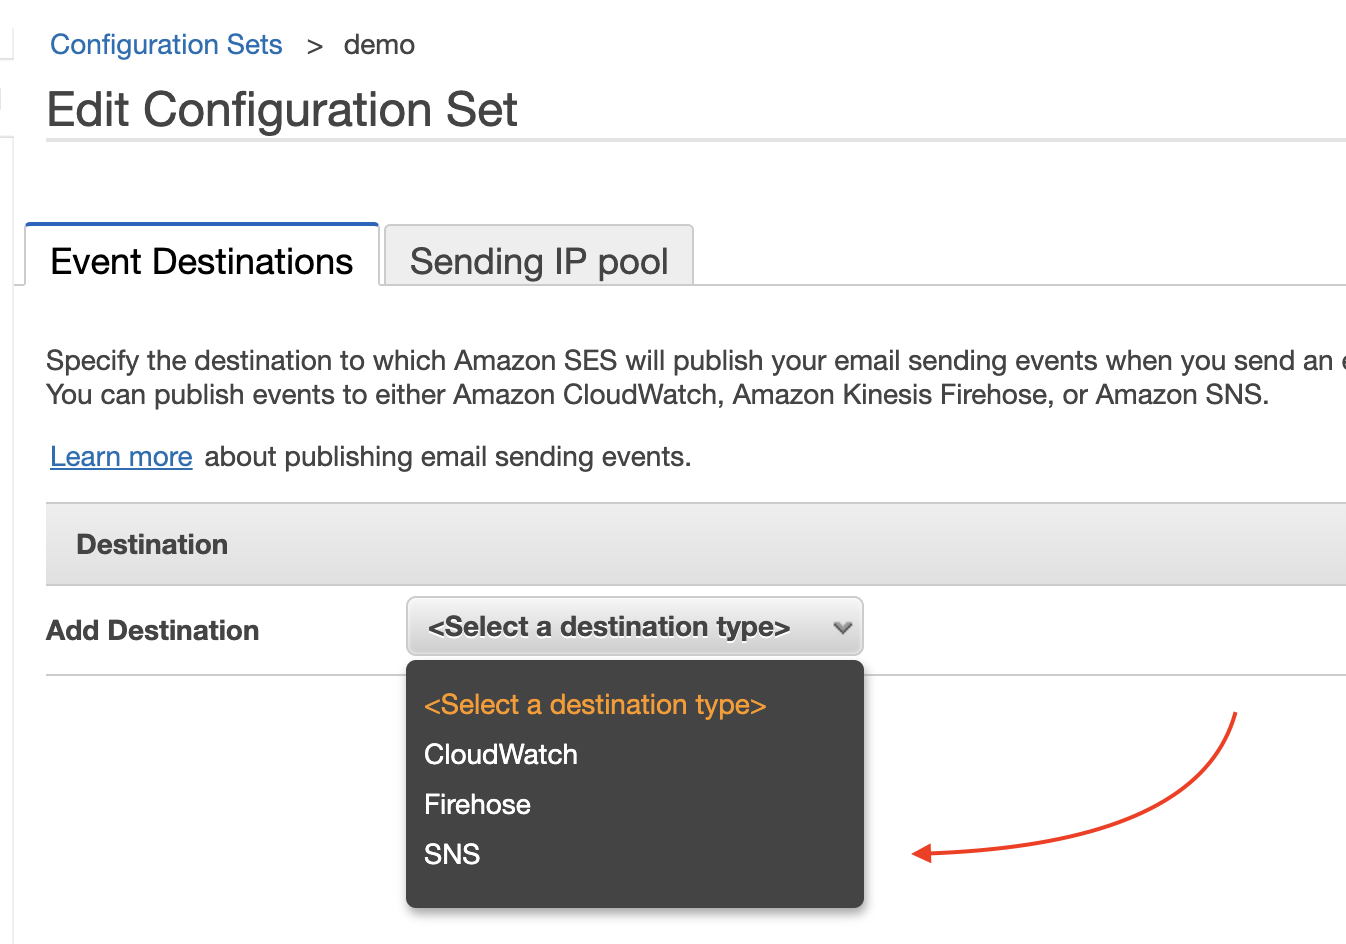
- Once done, click on the configuration set to add a destination. Select SNS as your destination.
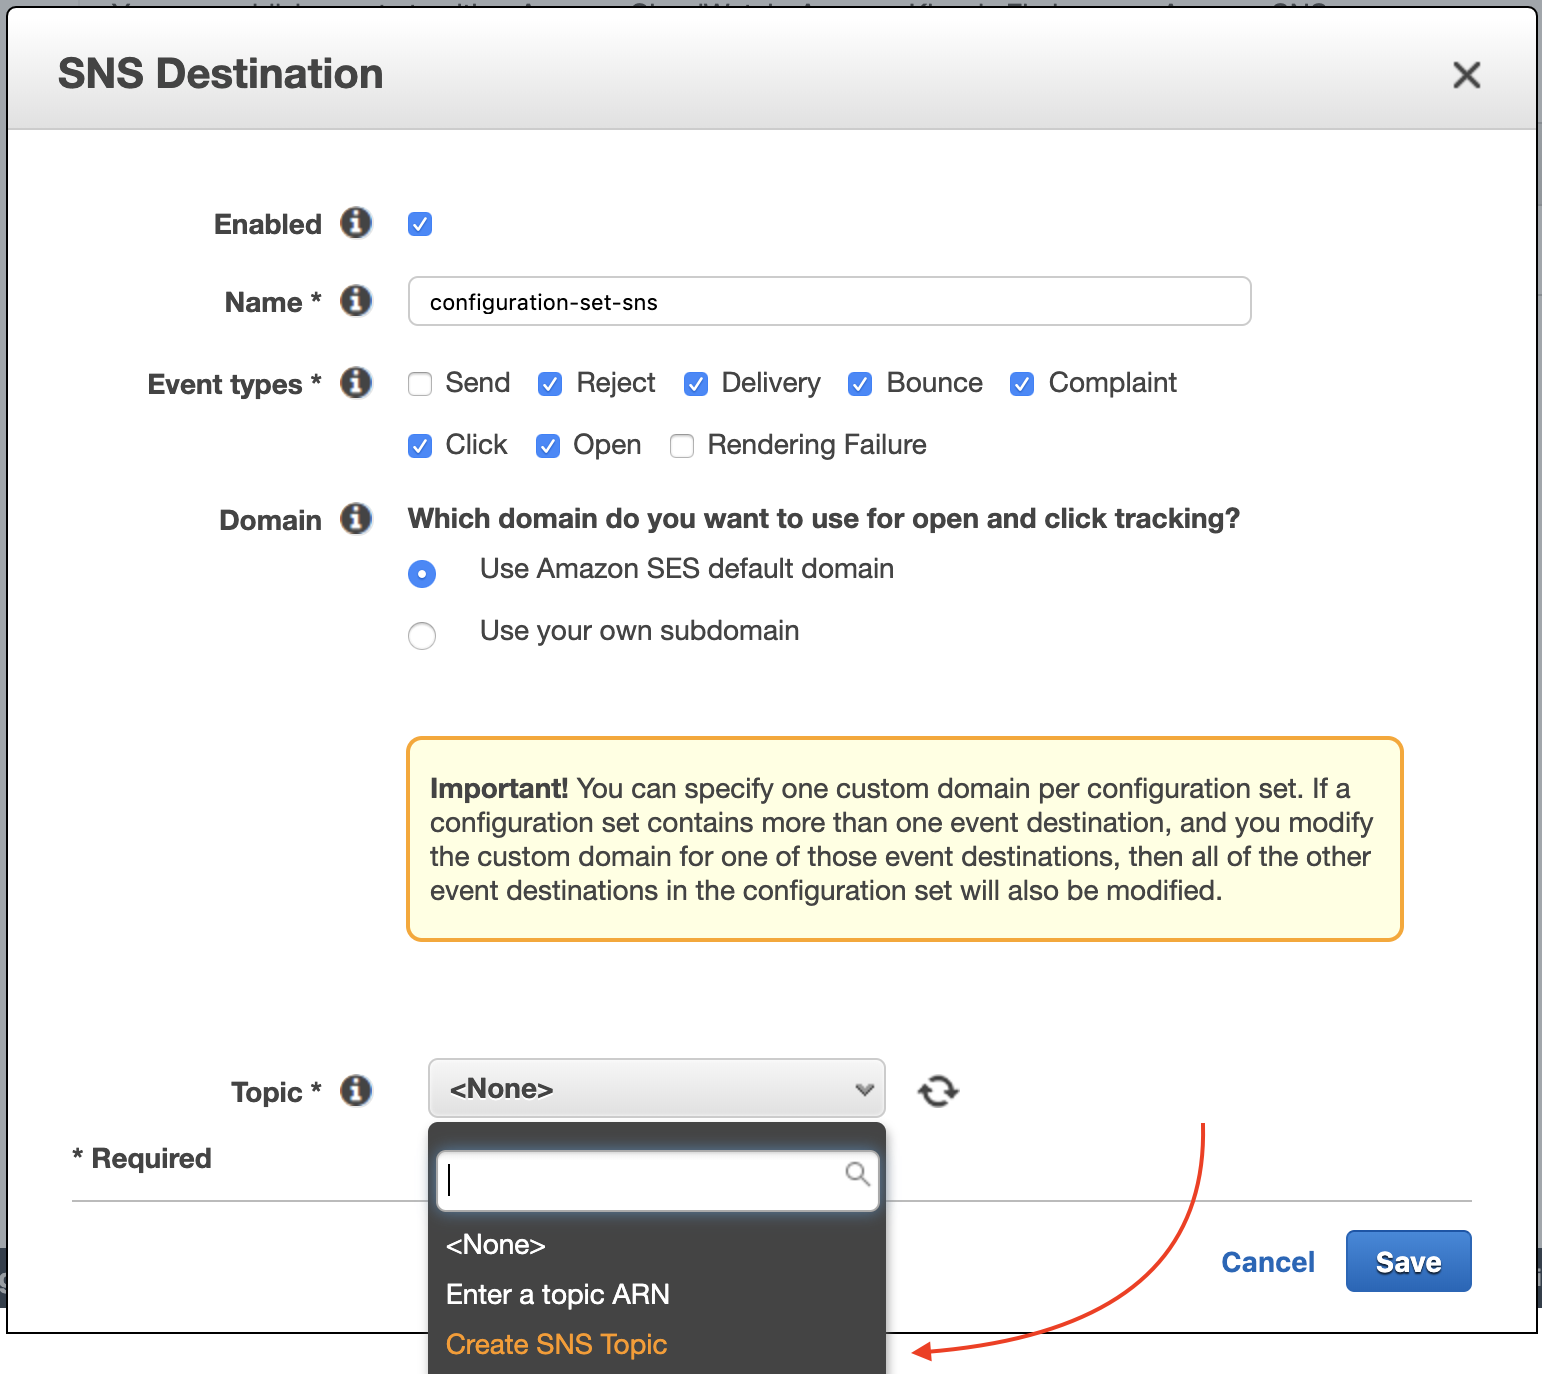
- You will be prompted to select the events you want data for. You will also need to add a name. If you are tracking opens or clicks (as we will), you will be prompted to use Amazon SES default domain or Use your own subdomain. For this piece we will stick to using Amazon SES default domain.
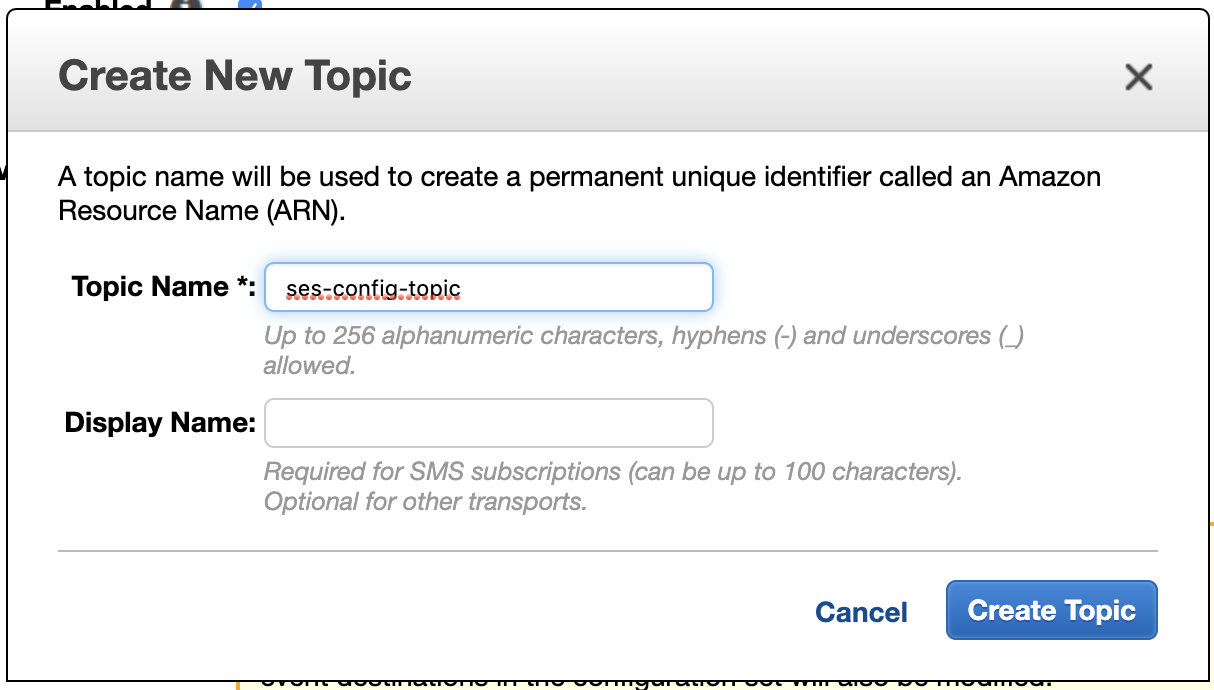
- Under the Topic section, select Create SNS Topic. We only need to add a topic name and we are good.
Now that we are done creating our configuration set and a SNS Topic, we need to update our SNS to add a webhook to receive the published events. But first, we need our webhook script.
Creating the script and webhook
Before we can add a webhook to our SNS, we need to create the script to process the received events first. To do so, we also need to know what the events data look like. You can find examples of Amazon SES Event Data here. (Also take a look at the content structure here: Contents of Amazon SES Event Data Published to Amazon SNS). With this, we can write a script that can handle the various event types.
Let’s create a boilerplate in Node.js. Create and change directory to a new directory. Let’s call it ses-events.
mkdir ses-events
cd ses-events/
Initialise the project and install express and body-parser.
npm init
npm i --save express body-parser
Create an index.js file with the content below. Modify as you want to.
const express = require('express')
  const bodyParser = require('body-parser')

  const app = express()
  app.listen(process.env.PORT || 3000)
  app.use(bodyParser.urlencoded({ extended: true }))
  app.use(bodyParser.json())

  app.post('/', (req, res) => {
    try {
      const body = JSON.parse(req.body.Message)

      // If there is no event type, then we've got nothing
      if (!body.eventType) { return res.end() }

      // What's the event?
      const event = body.eventType.toLowerCase()
      const eventData = body
      console.log(JSON.stringify(eventData, null 2))

      const domain = event_data.mail.tags['ses:from-domain'][0]
      const messageId = event_data.mail.messageId
      const date = new Date(eventData.mail.timestamp)
      const email = event_data.mail.destination[0]
      const subject = eventData.mail.commonHeaders.subject

      // #todo: Verify event is from SES

      if (event == 'click') {
        const ua = eventData.click.userAgent
        const url = eventData.click.link
        // do stuff here
      } else if (event == 'open') {
        const ua = eventData.open.userAgent
        // do stuff here
      } else if (event == 'delivery') {
        // do stuff here
      } else if (event == 'complaint') {
        const ua = eventData.complaint.userAgent
        // do stuff here
      } else if (event == 'reject') {
        const ua = eventData.complaint.userAgent
        const reason = eventData.reject.reason
        // do stuff here
      } else if (event == 'bounce') {
        const description = eventData.bounce.bouncedRecipients[0].diagnosticCode
        // do stuff here
      } else {
        // Not supported
        // do stuff here
      }

      // anything else can come in here

      return res.end()
    } catch (err) {
      // #todo: Track error here
      res.end()
    }
  })
For test, you can run this locally and use ngrok to create a public URL to it. Or use a service like Heroku, Vercel or Glitch to host it. Once we have a URL for our script, we can update SNS to send the events to the URL.
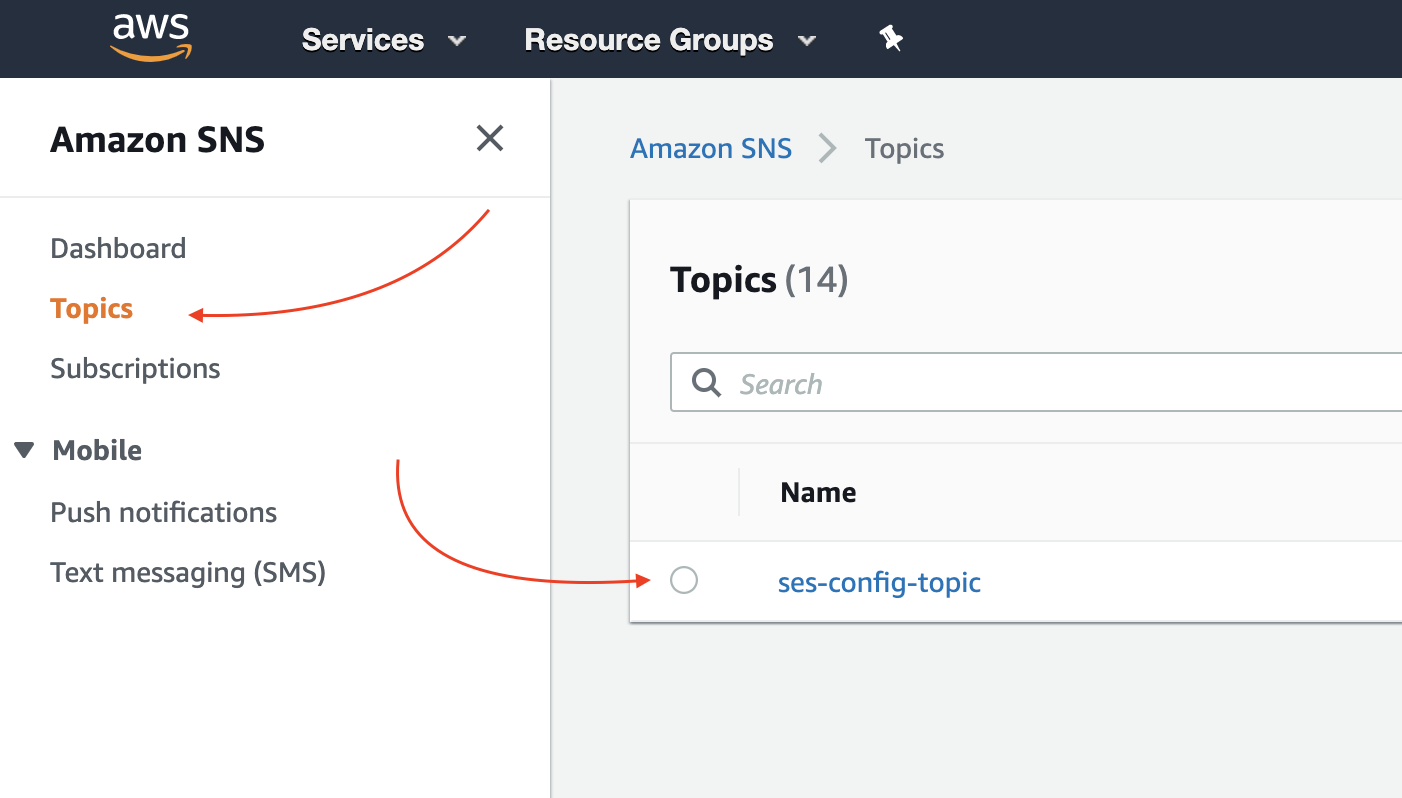
Go to Simple Notification Service (SNS) on the dashboard and click on the topic created for the configuration set. Click create subscription, choose HTTP (or HTTPS if your host provides you that).
There is a tiny part we missed. We need to confirm the endpoint before Amazon SES can send events data to it. Amazon will POST a SubscribeURL parameter to the endpoint. We are expected to visit the URL as a sort of verification. We can update our webhook script to take care of this automatically.
const got = require('got')
const express = require('express')
const bodyParser = require('body-parser')

const app = express()
app.listen(process.env.PORT || 3000)
app.use(bodyParser.urlencoded({ extended: true }))
app.use(bodyParser.json())

app.post('/', (req, res) => {
  try {

    // Include this new block
    // to confirm subscription
    if (req.is('text/*')) {
      req.body = JSON.parse(req.body)
      if (req.body.SubscribeURL) {
        await got(req.body.SubscribeURL)
        return res.end()
      }
    }
    // \endblock

    const body = JSON.parse(req.body.Message)

    // rest of our script
I am using got to “visit” the SubscriptionURL so be sure to install it.
npm i --save got
Click the Create Subscription button once done and you should be good.
Sending with the configuration set
The next part of the piece is telling Amazon SES to use our configuration set when sending emails. This is not done automatically. You need to edit your send scripts to add a header to tell Amazon SES to use the configuration set.
If you are using SMTP, simply add the header: X-SES-CONFIGURATION-SET: config-set-name
In PHPMailer for example, this will look like this:
// ...
$mail = new PHPMailer();
// ...other lines here
// custom header for config set
$mail->addCustomHeader('X-SES-CONFIGURATION-SET', 'config-set-name');
// ...
If you are using the AWS SES Nodejs Library, it will look like this
const ses = new AWS.SES({
  accessKeyId: process.env.ID,
  secretAccessKey: process.env.KEY,
  region: process.env.REGION
});
ses.sendEmail({
  Destination: {
    ToAddresses: ['[email protected]']
  },
  Message: {
    Body: {
    Html: {
      Charset: "UTF-8",
      Data: '<p>Yo. This is a test :)</p>'
    },
    Text: { Data: 'Yo. This is test :)' }
    },
    Subject: { Data: 'Hey' }
  },
  ConfigurationSetName: 'config-set-name', // <-- this
  Source:  '"Awesome co" <[email protected]>'
  }, (err, data) => {
  console.log(data, err);
  // ~
})
Making it scalable
If you send a lot of mails, it is important your script is hosted on a platform that can handle a lot of concurrent requests. You need a service that can automatically scale depending on the number of requests. My recommendation is to use services like Amazon Lambda or Google Cloud functions. The additional beauty of such service is you are not charged for periods your script do not have any requests. What’s more interesting is that you can directly connect Amazon SNS to Amazon Lambda.
To create a Lambda function, we only need to make slight changes to our script.
const got = require('got')
exports.handler = (event, context, callback) => {
  try {
    const body = JSON.parse(event.Records[0].Sns.Message);

    // If there is no event type, then we've got nothing
    if (!body.eventType) { return callback() }

    // process event here...

    return callback()
  } catch (err) {
    // #todo: Track error here
    callback(err)
  }
}
Few things you will notice
- I am no longer including
expressandbody-parser. Lambda handles the routing and processing of the request body. - My body data is coming from
event.Records[0].Sns.Message. This is how SNS sends data to Lambda. Its content will be a string so I need to convert it to an object with JSON.parse - I am replacing
res.end()withcallback(). Since there are no more req and res parameters, callback is how we tell Lambda we are done.
You can read more on Amazon Lambda here: Getting Started with AWS Lambda
Let’s switch from our hosted webhook to Lambda. We will start by creating the function.
- Go to Amazon Lambda service in your console.
- Click on Functions and the Create a function button
- Give it a name, chose the Node.js runtime and create
- Next scroll down to the Function code section. We are not going to be using the inline editor because we need to install
gotand there is no way to do it using the inline editor. Instead, we are going to be uploading our local setup. Change the Code entry type to Upload a .zip file. Note thatindex.handlerin the Handler input means “in index.js, make a call to exports.handler”. If you are using a different file name fromindex.js, then update the Handler section. - Change directory to your updated script folder. Remember to have installed
gotand removeexpressandbody-parser. Select all the content and zip it. You should see anindex.jsfile, anode_modulesfolder andpackage.jsonfiles. - Go back to the function page and click the Function package upload button. Select the zipped file and click the Save button. (Review the additional options on the uploaded Lambda function page. If you are using environmental variables, there is a place you can add them. You may also want to increase the timeout to something more than 3 seconds depending on the processing you are doing with the events data.)
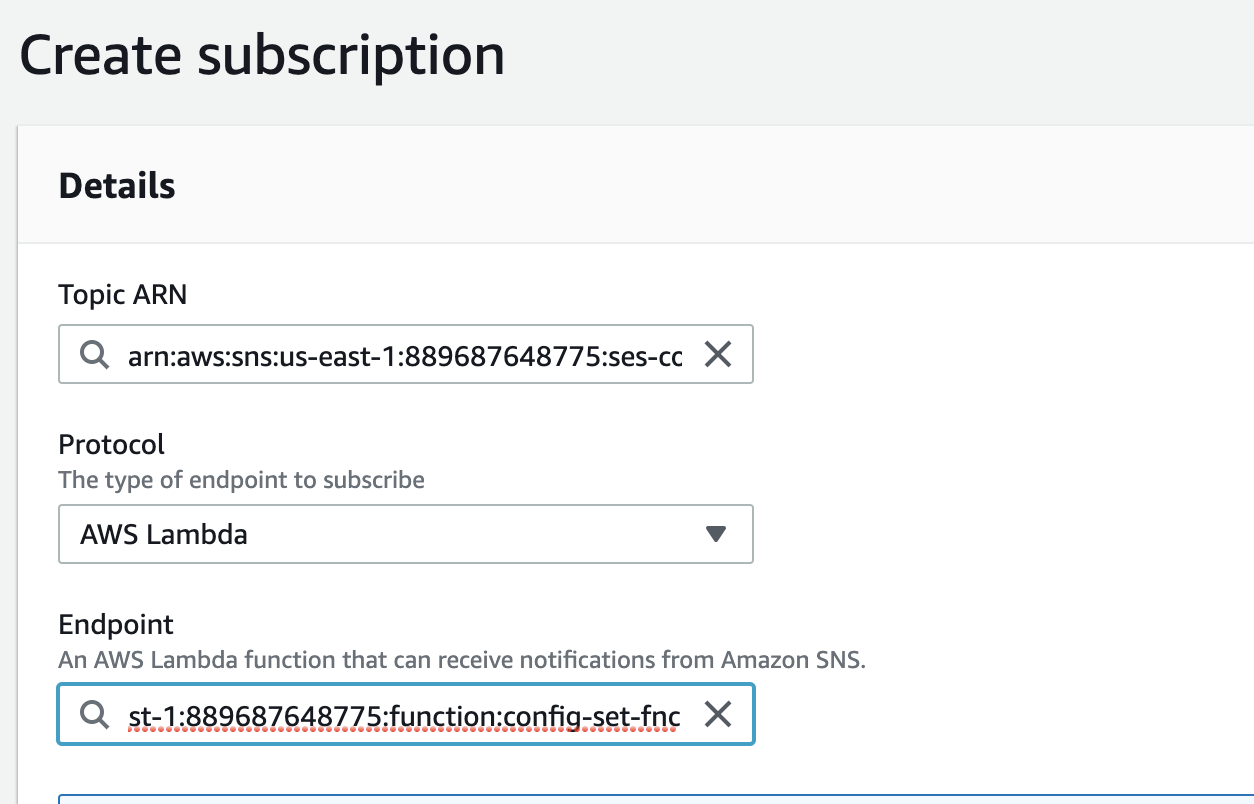
Once uploaded, we can go back to our SNS subscription, change the Protocol to AWS Lambda and select our Lambda function from the Endpoint options.
Conclusion
Phew. That seems like a lot. Compared to the interesting things you can do with the events data though, may be not. Engage handles all this automatically to present your email analytics and reporting in a simple and detailed way. Sign up for free.

FAQs
What’s the difference between Rejects vs Bounces
Rejects don’t reach the receiver’s email server. They only get to Amazon SES and get rejected. Bounces get to the receiver’s email server and get rejected. A reason a bounce can happen is if the email is wrong or full. If Amazon SES thinks it’s a temporary issue, if the receiver’s mailbox is full for example, it will attempt retries a couple of times before failing finally. You will get a bounce event at every attempt.
How does open tracking work?
Amazon SES adds a 1x1 pixel transparent image to the email to achieve this. There has been a lot of conversation around if this is ethical or not. For transactional emails, it’s a different conversation but one for some other time.
Few notes:
- This only works for HTML emails
- You can turn it off by not specifying a configuration set or not including opens tracking in the configuration set
- Opens tracking is not 100% accurate. Some email clients require receivers to explicitly load embedded images.
How does click tracking work?
Amazon SES replaces links in the email with another link that tracks click and redirect to the original link. To disable tracking on a link, you can add ses:no-track as an attribute to the A tag like this
<a ses:no-track href="https://engage.so">Engage</a>.
Click tracking also works for HTML emails only.