Introducing the Engage Zapier Integration
At Engage, we are always looking to make integrating your customer data easier, so that you can deliver a better experience to your customers. That is why we are thrilled to introduce the Engage Zapier integration.


Zapier connects to your choice applications so you can create workflows that move data between them automatically. This integration helps you automate sending customer data and events from these applications to Engage.
Starting from the top: What is Zapier?
Zapier is a workflow automation tool that lets you connect over 3,000 different business applications like Gmail, Slack, or Dropbox together with sets of if/else commands without any programming at all.
Within Zapier, the automated workflows that connect your apps and services together are called Zaps. Zaps are used to replace the mundane tasks that you need to deal with in your businesses, like adding appointments to calendars or uploading email attachments to Dropbox from Gmail. Each Zap consists of a trigger and one or more actions. If you want to upload email attachments in Gmail to Dropbox, you select the options for your Zap to make that happen. The interface is mostly point and click and you can be ready to go in no time.
The Engage Zapier integration
Engage helps businesses send personalised messages to customers based on their attributes and actions.
The Zapier integration lets you connect Engage with thousands of the most popular apps, so you can automate sending data from these applications to Engage—no code required.
With Zapier, we are able to offer even more integrations with the most popular business and productivity tools, and this new experience makes setting up & managing integrations even easier, faster, and more effective.
How to connect
- Log in to your Zapier account or create a new account.
- Click on the “Create Zap” button.
- In the “Trigger” section, search for the application you want to connect to Engage.
- Once the trigger application is set up, continue to the “Action” stage.
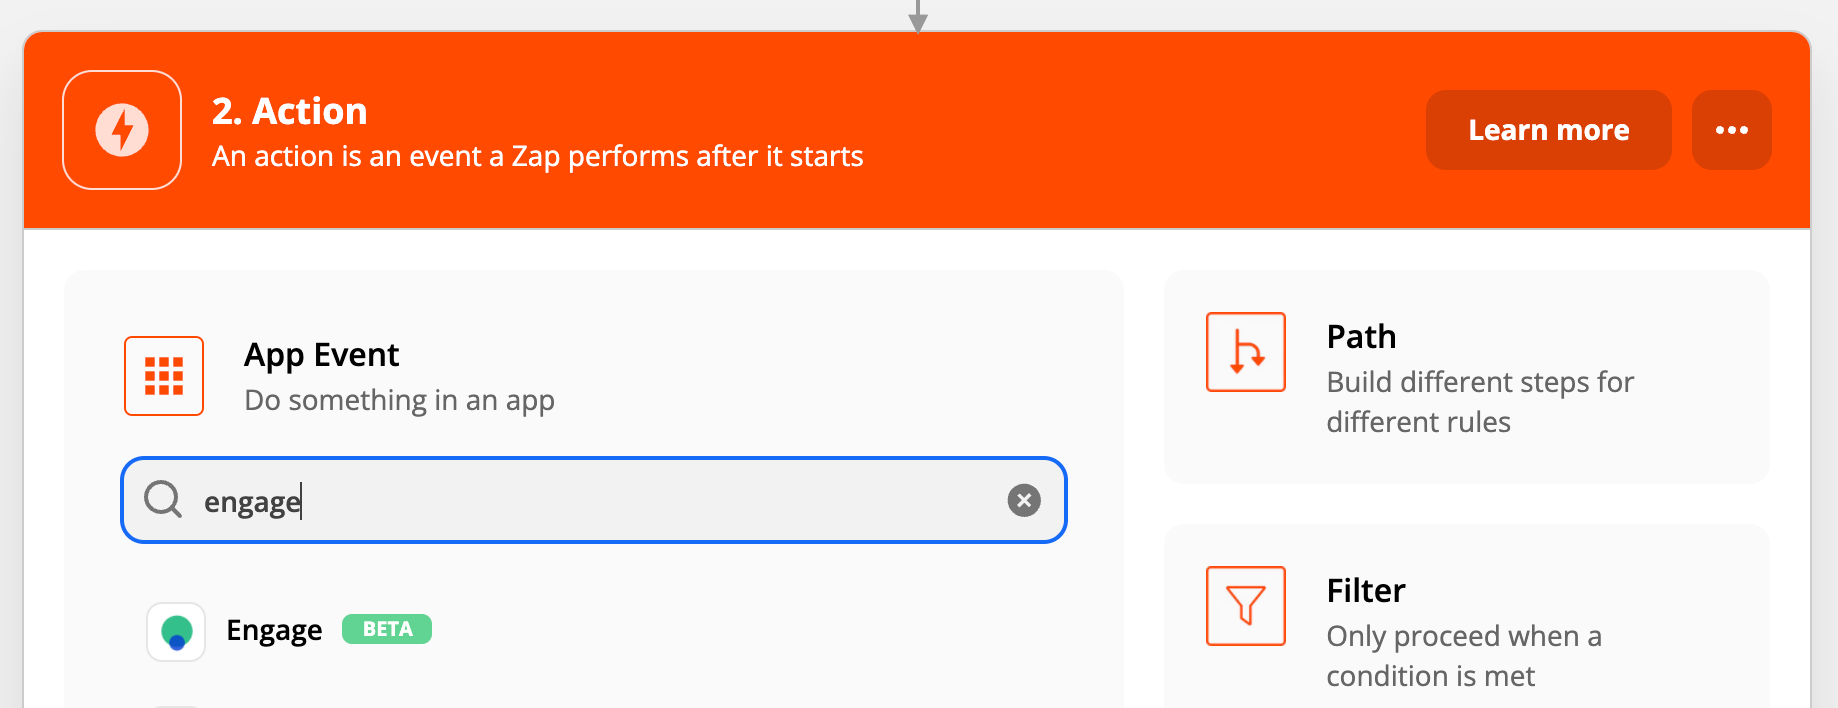
- Search for Engage.
To send customer attribute data from your choice application to Engage, follow the following steps:
- Create a new Zap.
- Search and Select the Trigger application.
- Select the event that contains the customer data you want to send to Engage.
- Search and select Engage as the Action application.
- Under Action Event, select Update or Create a New Customer.
- Once you click Continue, you will be prompted to connect your Engage account (if not done already) by entering your public and private keys. Your public and private keys are available in Settings -> Account on your Engage dashboard.
- Next, Set up action.
- Map the fields. Ensure that the User ID field is mapped to the trigger application’s user ID value. (This ensures that subsequent events can be rightly mapped to the user).
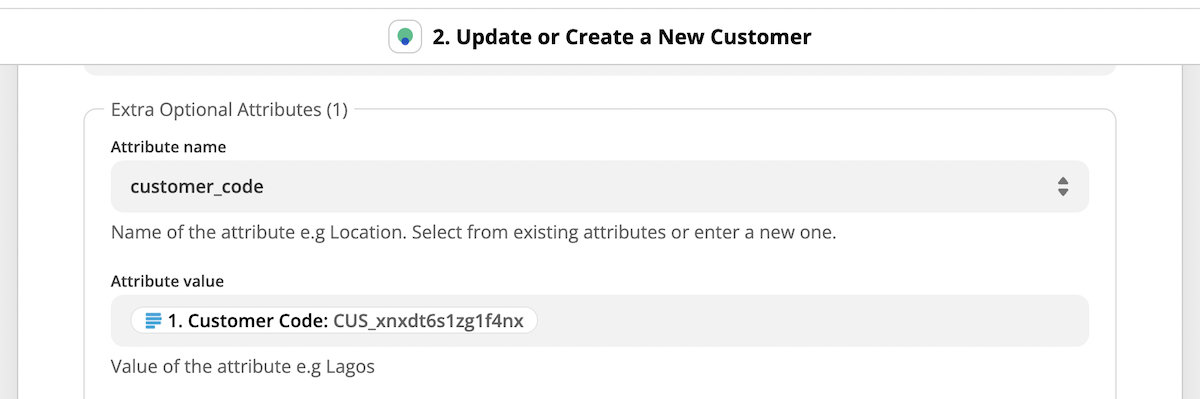
- To add an attribute, click on Attribute name. If you already have custom attributes sent to Engage, you can select them here. If not, click the custom tab and manually enter the attribute name
To send customer events from your choice application to Engage, follow the following steps:
- Create a new Zap.
- Search and Select the Trigger application.
- Select the event that has the event data you want to send to Engage.
- Search and select Engage as the Action application.
- Under Action Event, select Add Event.
- Once you click Continue, you will be prompted to connect your Engage account (if not done already) by entering your public and private keys.
- Next, Set up action.
- Map the User ID field to the trigger application’s user ID value (This is important as it helps Engage map the event to the right user).
- Next, click on the Event field. If you already have events in Engage, they will be listed here and you can select any of the listed events. If you have not sent any event to Engage, the list will be blank. Click on the Custom tab and you will be able to enter a custom event name.
Note: If the event has a single value or you are only interested in a single value, you can select the value in the Event value field. If however, you are interested in other properties of the events, you can use the Property fields for this. You can enter the name and value of up to 5 properties.

What makes this integration important?
At Engage, integrations are an easy way to connect your customer data from your favourite applications. Some of what makes this integration important are:
- Access to integrating thousands of applications to Engage
- Easy integration requiring no technical skill
- Access to an endless combination of triggers and actions.
- Save time on manually integrating Engage with your application.
Get Started With the Zapier Integration
The Zapier integration is now available to every account on Engage. Login to your Engage account, visit Settings -> Integrations and click on the Zapier option. This integration lets you send customer data and events from 3,000+ applications to Engage.
Want to learn more? Check out the Zapier docs. Don’t have an Engage account? Sign up now.